Tuesday, April 26, 2016

Curry in a Hurry


Curry in a Hurry

Lately all I see on the internet it “curry in a hurry” this “curry in a hurry” that and I realized that for me, that is my favorite kind of curry, something I throw together typically with the contents of my fridge.  It is never really pretty, but it really is delicious, simple and if you look closely, you already have half the recipe marinating in your fridge from Tandoori grilled chicken!!


Ingredients

1 cup 0% plain Greek yogurt

2 tbsp. canola oil

2 tbsp. Tandoori Spice mix

2 lbs. boneless skinless chicken tenders

1 large zip lock bag


1 zucchini, cut into matchsticks or quarters (think cut circles, then cut the circles in half and in half)

1 small onion, sliced

5 mushrooms, (button or baby bella) sliced

1 bag Dole baby spinach

1 tbsp. minced garlic (from a jar, Trader Joes is my favorite)

1 tbsp. minced ginger from a jar

1 cup fat free half and half, or whole milk (if you have coconut milk now would be the time to use it, but it’s curry in a hurry not curry after a trip to the market!)

Salt and Pepper

Cayenne pepper (Optional)

2 tbsp. coconut oil


Instructions

Add the chicken in the yogurt mixture to a hot pan with the coconut oil and sauté for about 5 minutes, use a wooden spoon to break the chicken into bite size pieces.  Then add the onion, garlic and ginger and sauté for another two minutes.  Add the zucchini and mushrooms and season with salt and pepper, if you want this to be spicy add as much or as little cayenne pepper as you wish, I added a little sprinkle but the sky is the limit (well the scovil scale is the limit but that’s for another day).  Add the half and half and lower the heat, stir until the sauce begins to thicken, usually 5 to 10 minutes, add the spinach, and mix to combine.  Once the spinach is wilted spoon over rice, cauliflower rice or quinoa.


IT’S THAT SIMPLE!  I wish I could tell you there is some voodoo magic here but there isn’t.  If you know you are making this recipe you can cut the chicken into bite size chunks vs just marinating them as whole tenders.  This is what I like to call a clean the fridge out meal, perhaps you had marinated the chicken earlier in the week and never grilled all of it, or you have extra carrots or peas from a meal during the week, throw them in there!  The only thing you may want to increase as you add ingredients is salt and pepper and the dairy element so that you have a luscious sauce to go over your rice or rice substitute.   

Tandoori Grilled Chicken with Easy Raita


Tandoori Grilled Chicken over green onion Cauliflower Rice and Easy Raita

With the weather heating up I love lighter food, fresh flavors and textures.  This chicken is delicious on its own but as a composed meal it works very well, and even the next day chopped up and tossed with Greek yogurt and chopped veggies as a light lunch.  As a semi homemade meal I need to give props to Trader Joes for making the world’s best cauliflower rice, because without that this week I would have been cranky as all get out trying to avoid carbs!  I suggest getting to a Trader Joes at 8 am when they open and scooping up a few bags, but if you don’t care about carbs any rice or quinoa is also excellent with this!  I am going to give you the ingredients to make your own Tandoori spice mixture which can be made in advance and stored in an airtight container for about a month!  It is excellent on skinless boneless chicken, or bone in chicken on the grill. 

Ingredients for Tandoori Seasoning mix

1 tbsp. ground ginger

1 tbsp. ground cumin

1 tbsp. ground coriander

1 tbsp. paprika

1 tbsp. turmeric

1 tsp. salt

1-2 tsp. cayenne pepper

Instructions

Add all to a bowl and stir to combine.


Ingredients for Chicken

1 cup 0% plain Greek yogurt

2 tbsp. canola oil

2 tbsp. Tandoori Spice mix

2 lbs. boneless skinless chicken tenders

1 large zip lock bag


Instructions

Add all ingredients to large zip lock bag, and mush together to combine (super technical right?).  Let marinade for anywhere between 1 hour and overnight.


Grill until chicken is 165 degrees with your meat thermometer. 


Ingredients for Easy Raita

1 cucumber, pealed and seeded, cut into a large dice or match sticks

1-2 carrots, peeled and cut into large dice or match sticks

3 radishes, cut into a large dice or match sticks

½ jalapeno seeded and finely diced

1 small plain 0% Greek yogurt

Salt and pepper

Instructions

Combine all ingredients in a bowl. Season to taste with salt and pepper.  Serve with tandoori Chicken. 


For the cauliflower rice, simply prepare as directed on the bag and add thinly sliced green onions throughout.  You can do this with regular rice, brown rice, or quinoa as well.  Or serve the chicken and raita over mixed greens with a squeeze of lemon and drizzle of olive oil for a no carb solution!


Chicken Milanese with Truffle Burrata Salad


Chicken Milanese with Truffle Burrata and Arugula Salad

Sometimes the weekend sneaks up on you and after a long week a really simple, really good dinner at home can top any dinner out, but shouldn’t make you feel any less fabulous!  Grab a bottle of wine and eat this salad any day of the week!  I personally, found truffle burrata cheese, but if you can’t find that you can grab some truffle oil at most supermarkets or specialty stores and marinade burrata in it for a while you prepare dinner. 


Ingredients

2 boneless, skinless chicken breasts, pounded thin

2 eggs, scrambled for a breading station

½ cup flour

½ cup seasoned bread crumbs

½ cup panko bread crumbs

¼ cup parmesan cheese

Oil for frying, for this I like to use olive oil personally but any oil to shallow fry will work

Salt and Pepper

1 small red onion, sliced thin

1 bunch arugula or spring mix

10 cherry tomatoes, quartered

2 balls burrata cheese (truffle, or plain is fine)
Prosciutto Di Parma, as much or as little as you like (clearly a lot is the answer)

Good Extra Virgin Olive Oil

Good Balsamic Vinegar

Salt and Pepper


Instructions

Set up a traditional breading station, flour, then egg, then breadcrumb mixture.  Combine all the breadcrumbs with the parmesan cheese and set aside. 

Heat olive oil in a large skillet.  Dredge each chicken cutlet in the flour, shake off the excess and place in the egg mixture and then the breadcrumb mixture and set aside for 5 minutes.  I like to do this because I feel the crumb mixture stays in place better than going from the breading to the oil immediately.  Carefully place the cutlets into the pan AWAY from you and cook until golden brown on each side.  Approximately 5 minutes each side. 


To assemble:  Put the crispy cutlet on a plate and top with burrata, if you can’t find burrata fresh mozzarella balls are an excellent substitute.  Add the arugula or spring mix, sliced onions and tomatoes.  I like to simply dress this salad with a drizzle of really good olive oil and really good balsamic vinegar with fresh cracked pepper and good sea salt.  If you cannot get truffle burrata or mozzarella you can drizzle LIGHTLY the salad with truffle oil, a little goes a LONG way and can quickly over power this whole dish.  Add some thin sliced prosciutto Di Parma and mangia!

Brie and Apple Stuffed Pork Chops


Brie and Apple Stuffed Pork Chops

Everyone has those memories of sitting around the kitchen table as a kid and mom serving crispy pork chops with apple sauce, nostalgia, I dig it, but sometimes I want something a little less breaded and fried and a little more refined.  Having gotten some nice thick pork chops on a steal at the market I knew exactly what I wanted to do with them, it helped that I had a lonely apple sitting around and a wheel of brie that needed a purpose besides me eating it by the slice late at night.  I find that stuffing things gives them a ton of flavor and is a excellent vessel for all sorts of ingredients that if placed on top will just fall off. 


Ingredients

2 large pork chops, I bought bone out, with a pocket cut into them (you can ask the butcher to do this for you!)

4 oz. brie cheese, sliced

½ granny smith apple, sliced thin

Italian seasoning

Garlic Powder

Salt and Pepper

Coconut or cooking oil

Tooth Picks (optional)

Dijon Cream Sauce (Recipe to Follow)


Instructions

Preheat the Oven to 350 degrees.

If you didn’t have the butcher cut a pocket in your pork chops, carefully with a sharp knife, cut a pocket into the side of the pork chop but don’t go all the way through.  Season all sides, including the inside with salt and pepper, garlic powder, and Italian seasoning.  Divide the cheese and apples between the two chops and stuff them, if there is extra don’t over stuff them as that will make the filling spill out!


Heat up a skillet (I used cast iron so I only had one pan to clean in the end but whatever you have works) and add the oil, sear both sides of the pork chops.  If you are using an oven safe pan put the entire pan in the oven for approximately 20 minutes or until the internal temperature (Told you that meat thermometer would be really handy) reads 165 degrees, you can take them out at 160 and cover them with foil while you finish the remaining steps. 


Serve with the Dijon Cream sauce and I served mine with the previous quinoa recipe.


Dijon Cream Sauce

1 tbsp. Dijon mustard

1 tbsp. whole grain mustard

½ cup cream

Salt and pepper

Add the ingredients to a small sauce pan, bring to a boil and reduce to a simmer until the sauce coats the back of a spoon.  Spoon over the pork chops. 

Brussels Sprouts Apple Quinoa

Apple Sprouts Quinoa


“Keen-oh-ah,” as my father so lovingly calls it is well, boring.  It’s quick yes, easy, also yes, a symphony on your taste buds? That’s a resounding no.  I like to jazz my quinoa up in so many ways and this may not be seasonal, but it IS delicious. 


Ingredients

10 Brussel sprouts, shredded (a lot of stores sell them pre shredded now, saves time, do it)

½ small onion, diced

2-4 strips bacon, cut into ½ inch pieces

½ granny smith apple, diced or julienned (save the other half for the accompanying pork chops, or peanut butter, whichever)

2 tbsp. apple cider vinegar

¾ cup prepared quinoa (prepared by the package directions and set aside)

Salt and Pepper


Instructions

In a medium sauté pan add the bacon pieces and cook until crispy, remove bacon from the pan with a slotted spoon and set aside.  Drain all but 2 tablespoons of the bacon drippings, you will use them to sauté the remaining ingredients, trust me, fat doesn’t make you fat!


Add the onion to the pan drippings and sauté until they begin to turn translucent, add the Brussels sprouts and sauté for 3-5 minutes depending on how tender you like your vegetables.  Add the vinegar and stir, sauté for 3-5 more minutes.  Add the apple and the prepared quinoa and toss with salt and pepper.  Finish by adding the bacon before serving so that it maintains its crisp, no one likes soggy bacon, and if you do, add it while you add the apples and quinoa.

As I write this up I realize some toasted nuts would also be fantastic in this, try it!

Wednesday, April 20, 2016

Award Winning Jalapeno Popper Burger & Jalapeno Bottle Caps


Award Winning Jalapeno Popper Burger

Several months ago I entered a local burger contest and by popular vote, I WON!  Super exciting!  I love burgers but often at home they go the turkey burger route and end up bunless, so when this burger was produced for the public it really was a treat.  However, I didn’t make it myself so while the idea was mine I didn’t actually make it and wasn’t entirely sure how I would.  Over the last few months I have played test kitchen and I finally have the recipe perfected!  Now, you could do this as a turkey burger but sometimes I just crave a good old American hamburger, made of the best ground beef you can get your hands on.  The burger place had been using Pat LaFrieda beef which we are lucky enough to be able to get our hands on through Fresh Direct but any ground beef that is high quality and 80/20 blend will do perfectly.  This recipe is for two burgers with all the fixings including jalapeno bottle caps!!!

Ingredients

12 oz. ground beef, I used Pat LaFrieda short rib blend from Fresh Direct which comes 4 patties to a pack

4 slices cheddar cheese from the deli

½ tsp. onion powder

Salt and pepper

4 tbsp. whipped cream cheese or softened cream cheese

2 buns, from the bakery or bakery section of the supermarket, seeded or not

Shredded lettuce

Slices of tomato

Coconut Oil or cooking oil of your choice

Jalapeno Bottle Caps (Recipe to follow)


Instructions

Season your ground beef or beef patties with salt, pepper and onion powder. 

Heat a large nonstick pan with your cooking oil and add your burgers cook about 3 minutes and flip, cook for 3 more minutes and add cheese and cover the pan.  This will get you a nice medium rare to medium burger and remember DON’T PRESS DOWN ON THEM!!!


On your buns spread the softened or whipped cream cheese on the bottom bun, season with salt and pepper, add the lettuce and tomato then your burger, add the remaining cream cheese to the top bun and season with salt and pepper to taste.  Top with jalapeno bottle caps, as few or as many as you like and enjoy!!!


If you want to kick this up even further, take the cream cheese and put it in the blender with a jalapeno and two green onion tops and blend it up!  You’ll end up with a fiercely green firey cream cheese spread that is phenomenal for a spicy fan and was excellent on some pretzel rods as a snack!


Jalapeno Bottle Caps

6 jalapenos sliced into half inch rounds

½ cup flour

4 tbsp. cornmeal

1 tsp. garlic powder

1 tsp. papricka

1 cup buttermilk

Salt and pepper

2 cups frying oil (vegetable or canola)


Instructions

In a medium mixing bowl combine the flour, cornmeal, salt pepper, garlic powder and paprika with the buttermilk and mix until combined.  Add the jalapenos and mix until well coated.


In a medium pot add your cooking oil and heat it.  Carefully add the jalapenos, divide them into three batches mentally and add them to the oil.  Carefully move them around with a slotted spoon and cook until golden brown.  Remove from oil with a slotted spoon and place on a paper towel lined dish, sprinkle with salt and pepper.  Repeat as necessary.


This makes far more than you will need for two burgers but they are delicious on their own or dipped into the extra cream cheese as a party snack!


Tuesday, April 19, 2016

One Pan Cherry Bomb Chicken and Veggies


Cherry Bomb Chicken and Veggies (One Pan!)

So many of you have asked me how I deal with the sheer amount of clean up that comes with cooking, and my answer is this: If you cook you shouldn’t have to clean?  No? Not an acceptable answer?  Ok, the truth is, it’s all about how you prep and while yes some recipes and meals do require a few pots or cutting boards, you can make a wonderful full meal with one cutting board, one spoon, one knife and one pan.  Easy. Peasy.  The important part here is learning, and yes it does take some time to remember to cut things in a certain order, and that’s ok, but once you nail that down you will be able to breeze through your prep and have a whole lot less clean up.  I’m going to write this recipe in the order in which you would use ingredients, so that way you can work on cutting in the right order so you can cut your chicken on the same cutting board you cut your zucchini on, just don’t do it the other way around…that pesky salmonella monster will sneak up on you!


Ingredients

1 zucchini, sliced and quartered

1 red pepper, sliced

6 button or baby bella mushrooms, sliced

1 small yellow onion, halved and sliced

2 cloves garlic, sliced

2 chicken breasts, cubed or sliced

1 tbsp. olive oil plus 1 tbsp. olive oil if necessary

Salt and Pepper


2 tbsp. chopped cherry peppers (they come in a jar and are VERY spicy, if you don’t like spice you can get sweet cherry peppers as well)

Parmesan Cheese


Instructions

Slice your vegetables in the order listed above, in doing so you can use one cutting board for this whole recipe. 


In a medium sauté pan add your olive oil, or whatever cooking oil you like, and let it heat up.  Add the garlic and onions and sauté for 3 minutes, don’t quite let the garlic get brown.  Add the zucchini and red peppers and sauté for another 3-5 minutes, I like my vegetables to maintain their firmness, but this is all personal preference.  Add the mushrooms, and season with salt and pepper.  Remove from the pan and set aside.


If necessary, add extra olive oil to the pan and add the chicken.  Cook the chicken for 5-7 minutes depending on how large you cut it, I sliced mine into half inch strips and this cook time worked well.  Add the chopped cherry peppers and mix to incorporate.  Add the vegetables back to the pan to bring them to the same temperature as the chicken.  Finish with grated parmesan cheese.


This meal can be bulked up if you have left over potatoes that can be cubed and added into the vegetable mix as well or served over rice or pasta.  The cherry peppers add a wonderful heat and acidity to the dish without needing to add a lot of extra herbs and spices.  I really enjoy spicy food but if you don’t that’s ok, they make sweet cherry peppers as well in the pickle aisle and they would be an excellent substitute! 

Buffalo Turkey Burgers with Celery and Carrot Slaw


Buffalo Blue Cheese Turkey Burgers

Turkey burgers are far and away one of my favorite go to meals because you can do so much with them in a short amount of time while keeping them relatively health conscious.  With just a few ingredients and about a half hour you can satisfy any buffalo wing craving.  While you can use store bought blue cheese dressing I really enjoyed making these with my homemade Horseradish Blue Cheese dressing which was featured a few weeks ago.  I don't know about you but one of my favorite things about going out for wings is the crunchy fresh celery and carrots on the side dipped in my buffalo sauce and blue cheese, but thinly sliced they make a fantastic slaw on top of this burger.


Ingredients

Burgers

1 lb. lean ground turkey

4 oz. crumbled blue cheese

1 tsp. garlic powder

Salt and pepper

4 tsp. butter (optional)

4 tbsp. Franks Buffalo Sauce

2 tbsp. coconut oil, or cooking oil of your choice

Slaw

2 green onions, green part, sliced thin

2 carrots, peeled, sliced thin

3 stalks celery, sliced thin


Blue Cheese Dressing (homemade or store bought, as needed)


Instructions

Mix the ground turkey with 2 ounces of the crumbled blue cheese, garlic powder, salt and pepper.  Don’t over mix because that can create a tough burger.  Make 4, 4 ounce patties and season the outside with salt and pepper.  Set aside.


I like to use a mandoline to slice my carrots and celery uniformly but if you do not have one just be mindful of your fingers and try to keep the slices similar in size.  Mix together the green onions, carrots and celery in a bowl and set aside.


In a non-stick skillet (try to use one that can fit all four burgers at once!!!) add your cooking oil and heat it up, a hot pan will create a nice crust on your burgers.  Add your burgers, DO NOT PRESS DOWN ON THEM, cook 4 minutes and flip, DO NOT PRESS DOWN ON THEM!  At the two-minute mark on the second side, pour the Franks on each burger and one teaspoon of butter to each burger (you can omit this if you wish) add the remainder of the crumbled blue cheese to each burger and cover the pan.  Let cook for 2-3 more minutes or until the internal temperature is 165 degrees. 


Top each burger with slaw and drizzle with blue cheese dressing.  Can be served with or without a bun and is excellent on a bed of lettuce as a burger salad.


When it comes to burgers there are some very important rules to live by and not pressing down on them is in the top 3.  It might seem instinctual but when you press down on a burger you are squeezing all the delicious juice out, and while on a beef burger you have wiggle room if you do this with a turkey burger you will end up with a dried out turkey hockey puck and no body enjoys those!

Thursday, April 7, 2016

Baked Pickle Fries with Southwest Avocado Ranch


Baked Pickle Fries with Southwest Avocado Ranch

One of our favorite burger spots makes pickle fries and while I love them, they’re not only fried but they are battered, and fried, so every delicious bite is also a touch shameful and I often find myself choosing between some milkshake and some pickle fries, and let me be honest the struggle is REAL. So during "take that take out" I decided I was going to make my own pickle fries and dipping sauce and that they would be even more delicious!  With some breading things logic, and the second try being the charm I found that you can make a whole jar of pickles into crispy, juicy, delicious fries in way less time than it takes for the delivery guy to inevitably screw your order up!


Ingredients

1, 24 oz. jar small dill pickles, cut into quarters

2 eggs, scrambled in a shallow bowl

½ cup flour

1/3 cup panko bread crumbs

1/3 cup corn meal, I had used coarse ground the first time and they were a bit TOO crunchy, so go for fine.

1/4 cup seasoned or plain breadcrumbs

¼ cup grated parmesan cheese

½ tsp. cayenne pepper

½ tsp. garlic powder

Salt and pepper

Cooking spray


Instructions

Pre heat the oven to 450 degrees and spray a large baking sheet with nonstick spray and set aside.

Drain the pickles and cut them into quarter and lay them out on paper towels, pat dry all sides.

Set up a breading station, dry, wet, dry.  In a shallow bowl put your flour, then in a shallow bowl put your eggs and scramble them, and in a third shallow bowl combine the breadcrumbs, cheese, cornmeal and spices and mix well to combine.

Take about 5 pickle spears at a time and coat them in flour, shake off the excess and coat them in the egg, then coat them in the breadcrumb mixture, be sure to press it onto the pickles so that it sticks well and covers all sides.  Place them on the sprayed tray and repeat until all of your pickles are breaded.  Try to use one hand for the dry part and one hand for the wet so you don’t end up with Franken fingers full of mucky breading.  Once all the pickles are lined up on the tray spray the tops of them with cooking spray as well!  Place in the oven and bake for about 25 minutes or until golden brown. 

Southwest Avocado Ranch

Ingredients

Southwest Avocado Ranch

1 tbsp. dill, chopped fine, or dried

1 tsp. garlic powder

1 tsp. onion powder

½ tsp. cumin

½ tsp. cayenne pepper

½ tsp. paprika

½ cup mayonnaise

¼ cup plain Greek yogurt

¼ cup buttermilk

½ small avocado

2 tbsp. white vinegar

¼ cup milk or half and half (optional)

Instructions 

Put all your ingredients into a blender and puree until smooth.  EASY, PEASY!


I hate ranch, notoriously, but this was absolutely delicious.  I added that last ¼ cup of milk and regretted it because it made my dressing a touch too thin, play with the ratios based on how thin or thick you like your dipping sauces, mine was more the consistency of salad dressing, which worked out perfectly for lunch today.


Wednesday, April 6, 2016

Zucchini Tots with Korean Ketchup


Zucchini Tots

When I was a kid, a tot if you will (haha) my mom would make these little zucchini pancakes that she would fry.  Lately I’ve seen all sorts of alternative “tot” recipes floating around the internet and I wondered if I could tweak her pancake recipe and turn them into tots.  The longer I pondered frying a “tot” shaped item the more I realized that seemed like a lot of time and that they needed to be baked while I whipped up some type of main dish, if you know me, this escalated quickly into a full blown pub grub dinner.


Ingredients

1 large zucchini, large shredded, and with the moisture squeezed out.  I put mine in a tea towel or cheese cloth and SQUEEZE it until I can’t get any more liquid out

½ small onion, finely minced or shredded (this works best if you have a Cuisinart or other type of food processor and aren’t doing it manually)

1 medium to large carrot, finely shredded

2 large eggs

¼ to ½ cup panko breadcrumbs (I used whole wheat panko)

1/3 cup finely shredded cheese (I used finely shredded mild cheddar)

½ tsp. garlic powder (a few shakes)

½ tsp. paprika

Salt and pepper


Instructions

Preheat oven to 400 degrees and spray a large baking sheet with cooking spray and set aside.


In a bowl combine the strained zucchini, onion, carrots, eggs, breadcrumbs, cheese and spices and mix with until well combined.  Depending on the sizes of your vegetables you will have to see how they can stick together in “tot” shape.  Roll them in your hands and shape into that signature “tot” shape and place on the sprayed baking sheet.  Bake at 400 degrees for approximately 15 to 20 minutes or until golden brown.


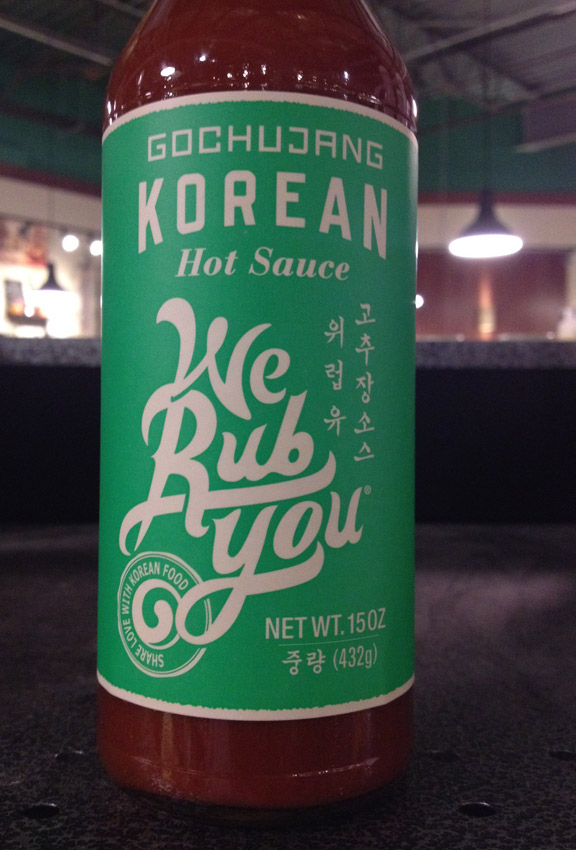
I served these with my We Rub You gochujang mixed with ketchup, figure 3 tablespoons ketchup to 1 teaspoon (to tablespoon depending on how spicy you like) gochujang, and stir until combined.  When I was a “tot” we would serve the pancakes with honey, or Tabasco but another delicious idea is to combine honey and hot sauce and use them as a dip too! These were so good I made a double batch the following night!

Jalapeno Popper Chicken


Jalapeno Popper Chicken

I thoroughly enjoy jalapeno poppers from a local bar, but just so we are all on the same page, they come from a box in the freezer at most establishments, you either get cream cheese OR cheddar and they’re just “ok.”  I make jalapeno poppers baked in the oven but that is for another day!  Take that take out brought me to jalapeno poppers but it also took me to dinner, and while in my early 20’s some bar jalapeno poppers might have been dinner, it certainly isn’t gonna cut it now a days.  And so we have, jalapeno popper baked chicken, saving money, and calories one dinner at a time.

Ingredients

2 chicken breasts, butterflied, and pounded thin.  This turned into 4 portions for me.  Pounding them is imperative as they will cook evenly and it will insure your chicken is tender.  You can also use thin cut chicken cutlets and briefly pound them

2 jalapenos, cut in half and remove the seeds if you do not want super spicy poppers, If you want to bring the heat, leave the seeds in. 

4 oz. cream cheese, softened

2 oz. finely shredded cheddar cheese

1 tsp. garlic powder

1 tsp. paprika

Salt and Pepper

Barbecue Sauce (homemade or whatever your favorite bottle is fine)

Extra cheddar


Instructions

Pre heat oven to 375 degrees.  Spray a baking dish with cooking spray and set aside.


In a bowl combine the cream cheese, shredded cheddar, garlic powder, and paprika in addition to salt and pepper.  Take the halved jalapenos and make a cream cheese combination football, place the football into the jalapenos and set aside. This amount should fill 4-5 halves abundantly.  Pound and portion your chicken and lay it out.  Salt and pepper the chicken and place one half of a jalapeno in each cutlet, and roll them tightly, place them seam side down in the baking dish and salt and pepper the tops of the chicken rolls.  Before you place them in the oven spread 1 tablespoon of barbecue sauce on top of each chicken roll up.  Place in the oven for approximately 20 minutes, add the extra cheddar cheese on top, eyeball it for about a tablespoon on each and put back in the oven for another 5-10 minutes.  Use your handy dandy meat thermometer that I’m sure you’ve bought by now to see that the internal temperature of the chicken is 165 degrees.  When they have reached 165 degrees remove them from the oven and let them cool for 5 minutes before serving, and the filling, just like a jalapeno popper, will still be lava so be careful while you enjoy!


These were absolutely delicious! Hit the spot.  If you crave the crunch of a jalapeno popper add some panko breadcrumbs on top of the barbecue sauce and omit the extra cheese for the crunch.  I served mine with some guacamole, salsa and Greek yogurt (or sour cream), seemed appropriate as that’s what bars serve with jalapeno poppers and wouldn’t you know it, it worked perfectly together. 


Spicy Sesame Korean Beef


Korean Sesame Beef

I really enjoy playing with the shelf I have devoted to the continent of Asia in my pantry, there are so many unique flavors and while most items from a take-out place tend to taste, and look similar enough.  When you make your own take, on take-out you can do SO many things that are SO delicious you’ll forget your log in for all those delivery apps!  Gochujang is my new favorite condiment and you can get it in most grocery stores, the one below I purchased at Bed Bath and Beyond, WITH a 20% off coupon and it is the perfect blend of sticky, sweet and spicy!


Ingredients

½-3/4 lb. beef, such as sirloin or tri-tip, but you can get the stir fry beef at the market too, if you are cutting the beef yourself cut it into thin strips, think every time you’ve ordered beef with broccoli, sized

2 tbsp. go chu jang, a Korean hot sauce (you can also use bbq sauce in place of this, stick to spicy not smoky)

3 tbsp. soy sauce

2 dashes sesame oil
3 dashes fish sauce (optional)

4 tbsp. canola or vegetable oil

2 tbsp. rice wine vinegar, you can get this at most grocery stores for about $1.50

1 tbsp. minced ginger, I used the squeeze bottle stuff from the produce section

2 cloves garlic, pressed

3 scallions, green part, thinly sliced (reserve one for serving)

1 inch of fresh ginger, cut into thin match sticks

2 tbsp sesame seeds, toasted (optional)

1 tbsp. cooking oil of your choice

1 tsp. sesame oil for cooking


Instructions

In a medium bowl put the go chu jang, soy sauce, sesame oil, canola oil, green onions, rice wine vinegar, garlic and ginger in a bowl and stir to combine.  Add the beef and stir to coat.  Let marinade minimum half hour and up to overnight.


In a wok or large sauté pan, heat the cooking oil of your choice and add the ginger, stir.  Add the beef with the sauce to the pan.  Cook the beef in the sauce for approximately 8-10 minutes depending on how “done” you like your beef. 


To serve sprinkle with toasted sesame seeds and some more green onions, spoon the sauce over rice, quinoa, or noodles.


This paired wonderfully with the quinoa fried rice I made in addition to some simply stir fried vegetables or even steamed vegetables would be excellent with this sweet and spicy sauce.  If you can’t find go chu jang you can use a spicy barbecue sauce in it’s place but as I said you can get it most grocery stores or Bed Bath and Beyond and it is currently my FAVORITE condiment, see: Korean Ketchup on everything!

Shrimp Fried Quinoa


Shrimp Fried Quinoa

We order take out often in our house, with busy schedules and big appetites sometimes cooking dinner just doesn’t happen.  But with take-out comes a lot of sodium, a lot of preservatives and A LOT of random calories that you simply don’t need in your lives.  On most occasions I avoid rice, white or brown even unless it is something that I feel NEEDS rice, like sushi, and if I could replace that with quinoa too I probably would.  Quinoa is gluten free, a whole protein and is chock full of amino acids and on top of that, it's delicious! If you aren't a quinoa fan you can do this exact same recipe with your favorite rice!


Ingredients

10 large shrimp, peeled, deveined, and cut in thirds

½ cup quinoa, rinsed

1 cup water

2 green tea bags

1 carrot, peeled, diced small

1 clove garlic, diced

¼ cup frozen peas (optional, I hate peas normally but really enjoyed them in this)

2 eggs

1 tsp. to 1 tbsp. soy sauce

1 tbsp. coconut oil (or whatever cooking oil you like to use)

1 scallion, green part, thinly sliced


Instructions

In a small pot add the quinoa, water, and two tea bags.  Bring to a boil, lower the heat and cover, approximately 15 minutes.  Carefully remove tea bags, cover and set aside.


In a sauté pan or wok, heat the oil up and add the carrots, let cook for approximately 1-2 minutes, add the garlic, and the shrimp and cook until the shrimp begin to turn pink, add the peas.  Break the two eggs into the pan and begin to scramble until the eggs are almost cooked.  Add the quinoa and soy sauce and stir to combine.  Serve hot with green onions on top.


This was FANSTASTIC on its own and even better covered in the Korean Beef and the sauce that goes along with it.  Add as much or as little soy sauce to the quinoa as you wish, the first time I made the recipe I felt it was lacking salt and the right amount of soy sauce is the perfect accompaniment.  If you are making this on its own feel free to add a few dashes of sesame oil to the coconut oil for even more flavor.  If you don’t have green tea bags simply use regular water, or you can cook your quinoa in any broth you have on hand, I like that the green tea adds a subtle flavor to the nutty quinoa.


Don't like shrimp? Sautee some chicken, beef or pork!  Vegetarian?  Some meaty mushrooms or tofu would be excellent as well!  Want more egg? Throw another one in!  Or any combination of the above!  There's no extra charge in this house!

TAKE THAT TAKE OUT April 4th to April 8th 2016

Lets be honest, take out happens, more often than at least I care to admit.  Life gets away from us and there is no way dinner is getting on the table when you can get delivery "much faster" right? WRONG!  Every time I use this logic a mediocre plate of whatever shows up anywhere from 45 minutes to two hours later and I'm ultimately starving and left completely unfulfilled from an over priced, calorie laden, preservative filled meal; if you can call it that. 

We have a take on Greek, Asian, and pub grub (my favorite!) all of which are inexpensive, quick and easy to make and ultra satisfying.  While you might spend some time in the market and think there are a lot of ingredients I can assure you that they are all inexpensive (and if they aren't I will warn you in the recipe, or give you an inexpensive alternative) and will be used over and over again as you make your own Plates of Wrath.  If you think you won't use a whole bottle of something, split it with a friend, grab some small mason jars and divvy it up so that you can share the wealth and the recipes!  Local to me?  Need a tablespoon of an off spice? Send me an email! I'll share if I can!  Question about a recipe? I'm here for you! Not sure where to get something?  If it isn't already addressed, someone else has the same question so let me know so I can address it and make your dinner delicious!

So put down Grub Hub, close out of Seamless, and delete Yelp.  But make sure to keep some cash in the house, these dinners are so good you're going to want to tip yourself! 

Grilled Seafood Citrus Salad


Grilled Seafood Citrus Salad


When you’re watching your waist line an excellent diet to try is the “see food” diet, ha ha! But sea food is awesome for you and very low in calories but for me, seafood salad means fresh crisp greens and grilled seafood, no mayo!   The dressing is also absolutely fantastic on the side of simply grilled shrimp for a cocktail party or appetizer as well.


Ingredients

½ lb. extra-large shrimp, peeled and deveined

½ lb. calamari tubes

1 bag mixed greens of your choice, I used a Mediterranean blend for this salad with radicchio and endive

½ bulb fennel, sliced thin

1 pink grapefruit, segmented

4 cloves garlic, minced

1 large handful washed parsley, minced

1 large handful washed basil, minced

1 lemon zested and juiced

1 orange zested and juiced

1 tsp. red pepper flakes

1/3 cup extra virgin olive oil

3 tbsp. champagne vinegar

Salt and pepper


Juice and zest of a lemon

Drizzle of olive oil

1 tsp. Italian seasoning

Salt and pepper


Instructions

Clean the seafood and place in a large bowl, add the juice and zest of one lemon, olive oil, Italian seasoning, salt and pepper and set aside.


Combine the olive oil, juices, zests, herbs, garlic, vinegar, red pepper flakes and salt and pepper in a bowl.  Take half of the mixture and put it in a blender and blend until smooth, pour back into the bowl, mix and set aside. 


Heat a grill pan, or grill, and add the shrimp and calamari.  Cook the calamari about 3 minutes each side or until they are white and begin to curl.  Cook the shrimp about 2-3 minutes per side or until they turn pink and opaque.  Allow the calamari to cool a bit and slice into rings. 


To dress the salad, add 2-3 table spoons of dressing to a large bowl, add some of the shrimp and calamari rings, and about 2 cups of the salad greens, some of the fennel and toss until everything is lightly coated with dressing.  Top with grapefruit segments.  If you do not care for grapefruit, you can use oranges as well. 


Spring Carbonara


Spring Carbonara

Spring is one of the best seasons for cooking, full of bright fresh, crisp ingredients that just barely need to be cooked to be utterly delicious.  Cue the winter re-do of 2016 where we have had 70 degree days in January and now in April it is in the 40’s, suddenly I had a refrigerator full of spring vegetables but I was shivering wanting comfort food full of cheese and carbs.  I do not often want pasta, but on this day pasta was screaming my name, pasta carbonara that is, but full of these lovely spring vegetables.  Traditional carbonara has bacon, eggs and cheese, save that cream for alfredo!

Ingredients

½ lb. fresh cut spaghetti, Whole Foods sells this fresh cut for about 2.50, but any spaghetti will do, I used fresh cut whole wheat

10 spears asparagus, cut into 2 inch pieces

4 baby bella mushrooms, sliced

½ small yellow onion, thinly sliced

4 slices bacon, cut into ½ inch pieces

1/3 cup grated parmesan cheese

4 egg yolks

½ cup reserved hot pasta water

Salt and pepper

Salt for pasta water


Instructions

Bring a large pot of water to a boil and add about 2 tablespoons of salt to it.  Add the fresh pasta and cook according to the directions.  Drain and reserve about 1 cup of pasta water, you may or may not use the whole thing.


In a large sauté pan add the bacon and cook until crisp, remove the bacon with a slotted spoon and reserve the bacon fat.  Add the onions, asparagus and mushrooms and cook for about two minutes.  Turn the pan off, and remove from the heat.  Add the cheese, ¼ cup of reserved pasta water and two yolks and quickly stir the pasta together to incorporate all the cheese.  If it is too thick add more of the warm pasta water until it is a silky consistency, think thin alfredo sauce.   


Add to bowls and top with the crispy bacon and one egg yolk per bowl plus add shredded parmesan cheese and cracked black pepper.  Serve IMMEDIATELY.


This is a very tricky recipe, and takes a few attempts usually before you know how to finesse it into being a sauce.  I like serving it with the yolk on top and lots of cheese and black pepper as the presentation is really beautiful and the extra yolk is really decadent.  The warm pasta water is really important as it binds the sauce together and allows you to make it as thick or thin as you want.  Super yummy, surely not a diet or low cholesterol dinner!